Transcript for the video "How I Made My Drumkit, Part 13"
Introduction
Wow it has been a while since I published a video on my channel. I started playing in a new band and that took up a lot of my free time. It also triggered me to change a few more things in my setup. I won’t go into all of these changes today, but I will show you two updates. After that, I will show you the changes in my drum software – as I promised last year. I will also explain the philosophy behind my “flexible metronome”.
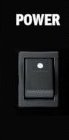
The update I have to show you concerns this MIDI controller in my equipment flightcase. In the past I used a netbook for my software, with a keyboard. I started using a tablet a few years ago, without a keyboard. Although I can make all my settings through the touch screen, I still missed the option to press hardware buttons to perform common tasks. So I added a MIDI controller for these recurring tasks. When I need to make more detailed adjustments, I use the touchscreen.
Software
Now what is this software and what does it do??? I made this software myself and I call this program Marcel Drummers Manager. I already made a video on this software, but that was over 10 years ago. The software has improved a lot so that is why I am making a new video on my software.
The goal of the program is to make practising and live performances more efficient. The idea for practise sessions is to make it easy to play along with original audio and/or band audio and to focus on specific parts or breaks within songs. When playing live, the software shows me notes and provides me with a click or metronome. As you will learn, I switch a lot between these words.
It is important to understand that although I play audio with this program, I do not use the tablet to play audio to the audience. The audience only hears the output of my drum module. You should see the program as a control panel. It is the heart of my setup, but… my setup does not depend on it. If the tablet should crash, the gig goes on!
I have made this drum software program on a Windows computer and it runs on Windows as well. In my drumkit setup I use a Microsoft Surface Pro tablet. Although I have a type cover and a pen, I rarely use them. I have made a stand myself, so that this tablet ‘hovers’ over my Roland module. So from top to bottom I have my tablet, my module and my controller.
Let me go through all the panels on the screen to show you what this software can do, and how I use it while practising and when playing live. I am recording this video on my laptop so that is why you will see a mouse cursor on the screen.
Select panel
Here on the top of the screen you can see a combo box that shows the name “Coverbowl”. That is the name of my current band. If I would open this combo box, you would see a list of bands that I have played in and a few bands that I have auditioned for. The band name that I select here, is the primary filter for all data. When I have to select a current song, I do not want to browse through songs I played years ago, in another band.
On the left side of the screen you can see a panel with the name Select. The first combo in this section is called Playlist and there I can select a playlist, which could be a setlist for a live gig or it could be a list of songs that I want to play at home. For instance I have the list “Huiswerk”, which is the Dutch word for homework. If I do not select a playlist, the list will show all the songs in the repertoire of the band, in alphabetical order.
For live gigs I usually have a setlist. But for special requests, I may need to select a specific song, that is not in the list or it may be scheduled for playing layer in the evening. So select that song, I have several options. I could filter on a genre, or on artist name, or I can do a Text search. After I click on the button and type “Go”, I find a Golden Earring medley. After confirmation that song is loaded. After that song, I can return to the setlist. If I need to play a song that is not in my collection, I just select my default drumkit by pressing a single button on my MIDI controller.
Below the list of songs, I have four buttons. The top two buttons are only enabled if the currently selected item is a medley. With those two buttons I can jump to the next or previous part within the medley. The two buttons beneath these two, are meant for selecting the next or previous item in the setlist (regardless of whether it is a song or a medley.)
The autoplay combo is very important. With this combo I choose between practise mode or live mode. The two Audio options are meant for practise, the Delay option means that the song will start a few seconds later. This is useful for recording audio or video. The two metronome options are meant for use during live performances. The ‘MetroPref’ option means that the setting in the song is the preferred option. Whether the click starts or not, depends on the Mode. I will come back to that in a minute. The ‘MetroCont’ option means that the metronome will be played continuously, regardless of the setting in the song.
The last combo in the left panel holds a few looping options. If I have chosen one of the two Audio options in the AutoPlay combo, setting the ‘AutoLoop’ combo box to anything else than OFF means that the program will automatically start playing the audio of the next song. As you can see, a list can include breaks, to indicate the first and last song in a set. When playing at home, I can continuously play audio files in a specific set or loop the whole list.
Metronome panel
The settings in the middle and right side of the screen, will change per song. So whenever a new song is selected on the left – either manually or automatically – the settings in all of the other panels will change. So the metronome panel shows the metronome settings for the current song, the Audio panel shows audio for the current song, etc. So the BPM is not the only thing I can set per song, all the other settings you see in the metronome panel can be set for each song as well.
In the top row in this panel I can select the sound that I want and whether I want 2 or 3 clicks per quarter note. One reason for checking one of these boxes is that these clicks are easier to hear, as drummers often play kick or snare sounds on the quarter notes. It makes sense to have these extra clicks be played at a lower MIDI velocity. So if I check one the two checkboxes, I usually enter a lower velocity value in the second box. I will explain the purpose of the Align note combo box in a minute, because that setting is linked to the slider at the bottom of the panel.
When I play medleys, they usually consist of three or four parts. For that reason I have added four items for each of the next three settings: Mode, Original and Target. If the item is a single song, I only use the first box on each of the three rows. First, the mode combo box. When I open it, you can see that the last option in the list is named ‘Always’. That means the click will keep sounding throughout the song or part. The first option is called ‘Tillplayed’. When I select that option, the click will sound until I start drumming. Technically speaking: when the first MIDI note on message has been received.
There are a few options between the first and last option in the list. In these cases, the click will not stop when I start playing, but a few bars later. Just to help me to keep the target tempo for at least a few bars. To summarize: setting the mode enables me to use the click in different ways. For songs that need to be played like a drum machine, I choose ‘Always’. For songs that require a more ‘human’ approach, I choose one of the other options. If a song starts with piano or guitar, I choose ‘Off’.
Below the mode combo box, there are rows for the Original tempo and the Target tempo. The Original box will show the BPM of the original song, usually the studio version. When playing live, you might want to play songs in a slightly different tempo (mostly faster). When the metronome is started, it will play the target tempo.
The buttons in the bottom row that start and stop the metronome will speak for themselves. So what remains is to explain the ‘flexible metronome’ part of this panel. You could say that the options I described a minute ago, give the drummer a fair amount of flexibility. But regardless of how you set these options, the click will only play in the tempo that has been set in the Target box. What I mean with a flexible metronome, is that the tempo does not need to be constant. Sometimes, I want the metronome to listen to the tempo that the drummer is playing... and adapt.
In the bottom of the metronome panel you can see a slider. When the slider is set the far left, the tempo is fixed. The metronome will play in the target tempo, regardless of what the drummer is doing. When the slider is set to the far right, the slider will follow the tempo that the drummer is playing. In most cases, that makes no sense. But you can set the slider somewhere in the middle. If you do that, the metronome will set a tempo between the target tempo and the drummers tempo.
Obviously, it is crucial that the system is able to measure the tempo of the drummer precisely. The software measures the tempo of the drummer by monitoring the MIDI note on messages, coming from the drum module. To get the best measurements, I added a combo box in the top of this panel. Here I can select which instrument (technically: which MIDI note number) should be monitored to determine the tempo of the drummer. The best choice depends on the drum pattern of the song. In a disco song, monitoring the kick should give a good result. In rock songs with a complicated kick pattern, monitoring the snare or the hi-hat could provide a better result.
You might say: why do you want to make a flexible metronome? I see this as a tool, that helps me to find and maintain the target tempo. It does not work perfectly at the moment, it depends on the drum pattern. But I will keep working at this.
Audio panel
The Audio panel is used for playing audio, mainly during practise sessions. The combo box can hold multiple songs, for example a studio version and a live version. The checkbox in the upper left corner can be used to loop the audio, to keep practising the same song.
The stop play and pause buttons will speak for themselves, the bottom row shows buttons to play specific fragments. That could be complex breaks or transitions from one part of a medley to another part. These fragments can also be played in a loop.
Sounds panel
The main function of the Sounds panel is to send MIDI Program change to select a specific drumkit for the song I want to play. In fact, this is the main reason why I created this software. Notes can be written on paper or on a tablet, but you cannot select a drumkit from a piece of paper. As you know by now, selecting a song in the Select panel will show all data of that song on screen…. but the corresponding Drumkit will also be selected on my Roland module. This is done by sending MIDI program change data to my MIDI interface, which is connected to my drum module.
My MIDI interface has two outputs, so I can change sounds on two different modules. In the past I used multiple modules, but today I only use the Roland TD-50X. So currently I do not use the second row in this panel. Just like in the Metronome panel, the Sounds panel shows four rows of settings, so I can select a different drumkit for each part of a medley. When I proceed to the next part of the medley, new program change data will be sent and you will hear other sounds when I play.
I can select the next part of a medley in one of three ways. Mostly, I press a pad on my MIDI controller. The second way would be to use the buttons in the Select panel. Both these methods require me to stop playing for a second and use a finger to press a button. If I do not have enough time, I can proceed to the next part of the medley, by hitting a specific pad. So I could hit a Crash or China cymbal with my left hand and the program will change the drumkit for me. I can set the MIDI note I want to use in the third row, in these three boxes.
Notes panel
Well it should be clear why I added a Notes panel. It is faster and easier to read than notes on paper. Years ago all my digital notes where in one colour, I now use multiple colours. The white text describes the amount of bars and what type the part is. The blue text is information on the drum pattern and I use yellow text for vocals. As you can see I use red text for time codes. Clicking on a time code will affect the audio player. The player will jump a specific time in the song. I use that during practise and rehearsals.
Miscellaneous
Well that covers most of the functions in the panels. There is also a menu. In the menu Lists there is an option to create a new list or edit the current list. A form will pop up where you can add items or change the order of items. Since all the data is text-based, it is also possible to use a text editor.
The song data is stores in text based files as well. I have all song data in an Excel application, where I can edit numeric data and notes.
In the menu you can see an item called Dumps. I planned to add the function to receive and send MIDI dumps. Just for backup purposes. But my current module – the Roland TD-50X – has an SD card slot, which makes it very easy to save backups on SD card. So at the moment I do not feel the need to add the MIDI dump functions right now.
Of course a program like this requires some global settings. On the main tab you can see that the program can load data from two locations, which can be convenient if you play in different locations. On the MIDI tab you can see that I can select four MIDI devices. Currently I have a MIDI interface that has two channels, but I only use one drum module. So currently I do not need to set the second device. The third device is the MIDI controller and the fourth device is the metronome. For the last one, I usually select the internal sounds, so the click does not need an external MIDI connection.
The options on the other tabs will surely change in the next few months, so there is no point in showing the current ones. The last thing I can point out that the program shows info on the status bar below . If the lists includes breaks, it will show the duration of each set and the total duration. This calculation is based on the duration of the default audio for all the songs in the list.
Conclusion
Well we have come to the end of this video, in which I have shown you my Drummers Manager software and how I use it. It is not specific for Roland modules, it is generic. Currently I do not sell licenses for this software, but that could change if a lot of drummers would like to buy a license.
In this video and in earlier videos I shared ideas for future updates. If you have ideas as well, please let me know. If this video inspires you to create your own software, that would be great as well.
I am not sure yet what the topic will be for the next video in this series. It could be an update on this software, showing either the flexible metronome or me controlling lights while selecting songs and playing certain MIDI notes. Although I am very happy with my drumkit, there is always room for improvement and I am not short on ideas. I hope you have enjoyed this video and feel free to leave a comment below for questions or suggestions!