Transcript for the video "How I Made My Drumkit, Part1"
Note: this page includes very few pictures, watch the video for the complete story!
Hi my name is Marcel and I would like to share with you how I made my electronic drumkit and how you could be making your own electronic drum kit. My drumkit is a 24 piece drumkit, I use 2 drum modules, a small mixer and a netbook with software that I developed myself. With that software, I control the sounds of my drumkit and it also includes an intelligent metronome, that I can program to follow my tempo. Everything fits in the back of my station wagon and I can set it up in only 5 minutes. If you want to see how I made it, keep watching because I will show you all the details!
This video is part 1 of a 10 part series and in this video I would like to give you an overview of my current electronic drumkit. I will show you my cymbals, pads, rack, cables, equipment and so on. Let’s start with the cymbals.
You could say that electronic cymbals are simular to electronic drumpads, the difference is in the packaging. A single zone cymbal is just a plate with a trigger underneath. The part that I call a trigger is the electronic part. The trigger converts the energy from a hit into an electronic signal. This is what trigger looks like by itself. I will explain how you can make a trigger in part 2 of this series. You might say that a trigger like this is the main ingredient in any drumpad and in any electronic cymbal.
About 10 years ago, I played mostly pop music and I used only two cymbals. Today I play mostly rock music and I use six cymbals. Cymbals are the easiest pads to make. However, if you are a rock drummer, make sure you don’t crash your crashes ;-) I will show you my trials and errors and how I made my current cymbals in part 3 of this series.
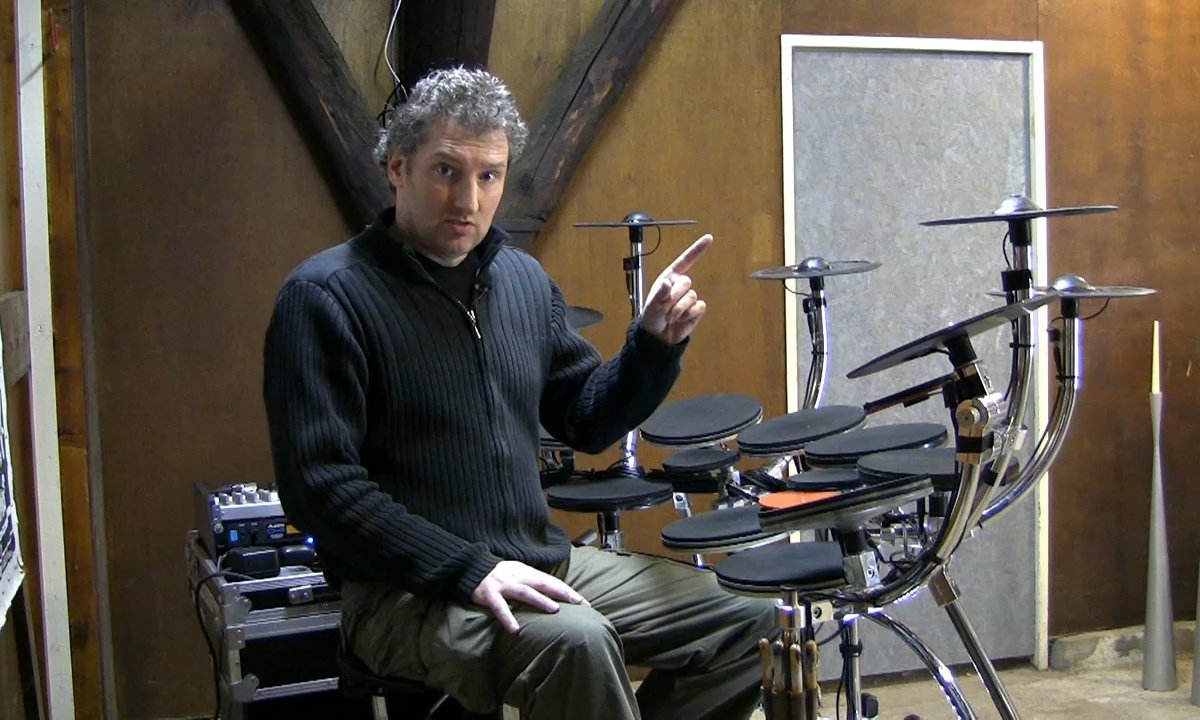
In my setup I use 9 single zone drumpads. They have a soft neoprene playing surface and consist of 2 moulded plastic parts separated by 2 cm of foam. So these are made from plastic but you could make similar pads out of wood easily. I eliminate crosstalk by using foam and silent blocks. I will show you how to make drumpads in part 4 of this series. The five smaller pads in my kit, are not drumpads. If you take a closer look they are actually cymbals.
I play four footpads using four bassdrum pedals. I play about 90% of all my songs on the two outer pedals, but for some I use the other pedals as well. The footpads are made of two steel parts and they also have 2cm of foam inbetween. I do not use a Hi-Hat pedal, all my cymbals, drumpads and footpads have piezos. More on footpads and how I play Hi-Hat in part 5.
All of these pads are held together using a rack. Instead of buying a drumrack, you could make a rack yourself, using pipes and connectors. This system is originally designed for shop interiors but I have been using it for drumracks for about 20 years. The connectors are not as flexible as the usual drumrack clamps, but by adjusting the length of the pipes you can made a custom rack very easily. I’ll show you how I did that in part 6.
You need to connect each pad to your equipment using a mono signal cable. My kit has a lot of pads and I want to be able to setup my kit in a few minutes. So I use a multiconnector to connect all pads to my modules. I'll explain more about cables and I will show you my multi connector in part 7.
Over here I have my equipment in a separate flightcase. As I mentioned in the beginning, I use two drum modules: one Alesis D4 and one Roland TD8. My reason for using two is that my kit is a 24 piece kit and these modules only have 12 inputs each. I also use a small mixer and a netbook. The netbook controls my drum modules using a USB to MIDI interface with is underneath the netbook. Here on the left I have a socket with overvoltage protection. I use headphones during practise and in-ears when I play with my band. I will explain more about my equipment and show you the trigger-, the MIDI- and the audio connections in part 8.
The netbook is a small computer but it is the heart of my setup. Being a software developer, I have made software for it myself. I do lots of things with it, so I decided to make a separate video on the software alone. For now, let’s say that it’s primary function is to play audio and it’s secondary function is to select sounds on my drum modules, through MIDI. Also, the software has an intelligent metronome. I will show my software in part 9!
Beneath my drumkit you can see a podium, which is not just a podium. It is also my flightcase. The entire drumkit fits in this flightcase and together with the small flightcase with my equipment, everything fits in the back of my station wagon. I will show the conversion from flightcase to podium, in the last video: in part 10.
This concludes part 1 of this video series. In this video I gave you an overview of my current electronic drumkit. In the following 9 video clips I would like to share all the details of my drumkit and help you design and build your own drumkit. Because I understand that not all of you are interested in all the details, I divided the whole story in 10 parts. Also, I have written transscripts and pictures on my website, so you can browse through the whole story to find out which of your questions are answered in which video.
I hope you will find this video series interesting. If you do, please spread the link to this first video. If you have built your own electronic drumkit, you are welcome to send me pictures of it. Have fun!
Click here for the transcript of the next video in this series